How to Fix a Leaky Faucet: Step-by-Step Guide | Pro Service Mechanical
In older homes, leaky faucets are a common occurrence. Old seals wear out, fixtures rust or corrode, and connections become loose. If there is water running from the wrong places every time you turn on your faucet, you will need repairs very soon. However, not everyone needs to call for a plumber to fix a leaky faucet. If you have the right tools and some handy skills, you can start fixing a leaky faucet yourself.
At Pro Service Mechanical, we can give you a few helpful tips on DIY faucet repair, but we are also always here to help if the problem is beyond your expertise or you don’t have time to do the full repair on your own.
Let’s dive into the step-by-step process of fixing a leaky faucet.
1) Gather Tools and Supplies
The first step in fixing a leaky faucet is gathering everything you will need. This way, you can perform the repair quickly from beginning to end without interruptions.
- Towel
- Drain Cover
- Flathead Screwdriver
- Needle Nose Pliers
- Hex Wrench
- Toothless Wrench
- Replacement Faucet Kit
You will also want a replacement faucet kit for the type of faucet you have. There are four types of faucets, each with a unique arrangement of seal valve mechanisms.
- Compression Faucet
- Ceramic Disk Faucet
- Cartridge Faucet
- Ball Faucet
2) Turn Off the Water Supply
Once you have gathered the supplies, find the nearest water valve. Ideally, there will be one below, behind, or near the sink that shuts off the water to your sink. This will ensure that when you take apart the faucet, you don’t get a spray of water or a flood in the bathroom. When the water supply is turned off, run the faucet until water stops flowing – just as you would when putting away the garden hose.
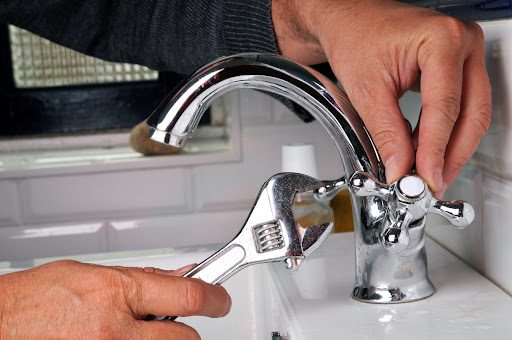
3) Disassemble the Faucet
The next step is to take apart your faucet. If your faucet has two handles, remove the caps to access the screws in the top center of each handle. For a single lever handle, remove the top lever piece. There may be a small hole in the side to allow you to pry it off or access a small hex nut that holds it in place. From there, you can take both types of handles apart vertically and access the faucet mechanism.
You may need to pull a retaining clip with needle nose pliers and cut the o-rings with a utility knife to fully disassemble each faucet. Use your flat-head screwdriver to free up parts that may have corroded or fused together with the water scale.
4) Replace the Faulty Parts
The most likely sources of your faucet leak are the washers and o-rings where tension and a retaining seal are formed. Replacing these pieces or any clearly damaged parts will be your goal to fix the leaky faucet. Often, your best bet is to fully replace your faucet mechanisms with a new kit, especially if the faucet you are fixing is quite old or already clearly corroded with time.
Alternatively, you can purchase specifically measured and selected parts and just replace things like the o-rings and washers that have stopped holding a seal.
5) Reassemble the Faucet
Put your faucet back together by reversing the order in which you took it apart. Replace the washer and o-ring set secured with the screw below. Reassemble the valve mechanism based on either your faucet’s old design or the new faucet you decided to install. Place the control nut into the top so that the handles will catch and provide flow control. Finally, reinstall the handles and secure the cap item into the top.
At every step, make sure that each component is properly tightened or you’ll be dealing with a leak all over again.
6) Turn the Water Supply Back On
Once you are certain your faucet is fully reinstalled and each piece is tightened with the appropriate seal, turn the water supply back on. Check for leaks around the handles above and below the sink. Then turn your faucet on to discover if you have fixed your leaky faucet problem.
If the faucet still leaks, look for where the leak is coming from. You might be able to quickly troubleshoot the problem now that you know how the inside of your faucet works.
7) When You Don’t Have Time for DIY, Call a Pro
Fixing a leaky faucet is a fairly involved process that requires an understanding both of how seals and plumbing work and the specific type of faucet you have. If your faucet still leaks after a DIY repair or you just don’t have time to dive into your sink with wrenches and pliers, you can rely on Pro Service Mechanical to quickly repair your sink anytime. Schedule your faucet repair on our website or you can call our 24/7 emergency plumbing services if your leaky sink has quickly become a disaster situation.
At Pro Service Mechanical, we are dedicated to keeping local homes comfortable and well-maintained, from leaky faucets to large-scale repairs. Contact us today for repair professionals you can rely on.